Friday, July 25, 2014

Summer Garden Pincushion- Monthy Stitch Tutorial -Part 1

One of my most popular pincushions is my "Summer Garden".


This linen pincushion is filled with beautiful embroidered flowers. Each time I create it, I add or subtract a specific flower making each one unique. I may add a butterfly or a hummingbird. Or just fill it with blooms. I love to figure out how to recreate the beauty of nature with embroidery floss. The challenge makes it a fun project to create over and over.

Since this is one of my more time intensive pincushions, I'm going to make it a bit easier for you by only using 6 sections and 6 flowers. This will give you a bit more room to play. Each flower deserves your closest time and attention. With 8 sections and 8 different flowers, it usually takes me a few weeks to complete. This pincushion will be a bit quicker. If you want to create 8 sections, by all means do. You'll just have to adjust your pattern.

I'm going to break this project in sections.
Part One will be getting ready, buying your supplies and creating the template.
Part Two will involve embroidery lessons and how they are used to create each flower. I'll break it down into a few lessons so you can stitch a few flowers each month.
Part Three will show you how to finish up your pincushion. Lets do this in late October. You can check out the Classic Pincushion Tutorial if you want to jump ahead at any point.

I will introduce a variety of flowers to you. There are only about 9 stitches to learn! Each post will take you through 3 embroidery stitches.
I'll show you how to use them to create one or more flowers. That will give you lots of options for your pincushion!

If I were to create one for holiday giving, and I only had a bit of free time each week, this would be a fun project to start this summer.
Since its hard for me to keep up with this pincushion during the holidays, I thought I would create this ongoing tutorial. I will take you through each flower, stitch by stitch. If you are unfamiliar with embroidery, I have a stitch tutorial page showing how each stitch is made.

Each week I will teach you how to create a few flowers. I'll walk you through the stitches required. I will show you how I go from a sketch to a pattern. Then I'll show you how to design your custom pincushion.
If you are an experienced stitcher and you would just like to work from a full printed pattern, watch my Etsy shop. I will add an 8 Flower, Summer Garden Linen Pincushion Pattern to my shop in August. You will be able to follow a specific pattern, purchase floss by color number and follow my instructions on how to finish your pincushion. If you get lost along the way, just pop back here for more detailed instructions.

For this tutorial, each step will have a printable instruction sheet with basic instructions.


So lets begin!
My last post goes into greater detail on purchasing floss, needles and your fabric. You can download my Revised Embroidery Floss Basic Color List (PDF). Here is a JPG if you would prefer that file type- Embroidery Floss Color List JPEG It lists all the colors you will need for this project and more.
If you have read my last post, this next part refers to that information. You can skip down to the picture of the tools you will need. I know you are busy. This next part is a quick overview.

Fabric Choice-
If you are new to embroidery, I suggest you start with a practice cloth. Pick up a piece of linen or linen blend in natural or ecru. The weave should be a bit loose. This makes stitching easy and fun, even if you hands are like mine, a bit worn but always willing.
Other great materials for embroidery are felted wool, wool felt, hessian cloth, or an textured woven cloth with a soft drape. Some inexpensive muslins are great for playing. If you work on quilting cotton or worse, a batik, you may find that the cloth is harder to pull a needle through and if you do a lot of stitch corrections, the holes don't close back up as easily. But, please don't let you fabric choice get in your way of creating this project. If you are determined, you can work with any cloth you have on hand.

Tip: There are times when I like to stitch on batik or I may need to pull a needle through multiple layers of fabric. I keep a small, jeweler's pliers handy. This is a great tool to keep you from straining tired or arthritic fingers. It is also the perfect tool for bullion stitches with many loops. Just be certain that your pliers has smooth jaws or you will scratch your needle. A dull, burred or scratched needle is your worst enemy.

Needles-
I like a thin tapestry needle, size 24-26. It has a semi-blunt point, but because it is so fine, it is sharp enough to piece through a loosely woven fabric like linen. The long thin eye is easy to thread.
I also use Chenille needles in the smallest size available, such as size 24 or 26.

Another great choice is a size 8 Embroidery Needle with a sharp point. It will work with most any fabric you have. The needle is larger than most needles and the eye is nice a large so threading your floss is a snap.

Embroidery Threads-

I use DMC embroidery floss with 6 strands. I will give the color number when I have it, but please feel free to substitute at any time.
I would not recommend using a budget brand of embroidery floss. You will find that it knots up more often. The colors may be bright, but they may fade much sooner than a quality thread. If you are going to invest a lot of time into your work, you want it to last, and you don't want to spend more time fighting your threads than you do stitching your stitches. When each hank of floss is less than 40 cents each, why not splurge!

I recommend that you pick colors that appeal to you. If you are going to do a lot of embroidery, which is very addicting, go out and buy about 20-30 colors. You will need greens, yellows, pinks, reds, purples a few blues. You can just pick colors willy nilly, but in the end, you will be at a loss when you begin stitching.
Here is how you add some method to the madness.
Choose 3 pinks- Choose the main flower color and 3-5 coordinating colors; one darker, one lighter, one warmer and one cooler shade.
Then repeat the same for your yellows, reds, greens, purples and blues.
Coordinating colors are often together on the rack. You can find floss in any sewing or craft store.
Don't forget to add ecru, white, brown and black. You just never know when you are going to need them.


Here are the 8 flowers we will be creating in this tutorial.
Chrysanthemum (Mum)
Daisy
Sunflower
Lavender
Hydrangea
Geranium
Coneflower
Rose

Of all the flowers in the world, you have to list only 6 for the flowers you would like on your pincushion. You will find that many of the flowers I will teach you can be adjusted slightly to create an alternate flower. For instance, a simple daisy can easily be transformed into a sunflower, a dahlia, or a Gerbera daisy. The above pincushion has a few other flowers such as a Forget Me Not, Queen Anne's Lace and a few fantasy flowers. I've also stitched roses, mums, coneflowers, hydrangeas and sunflowers. The pincushion on the very top of this post has hollyhocks and a pink delphiniums.
Don't be afraid to play!
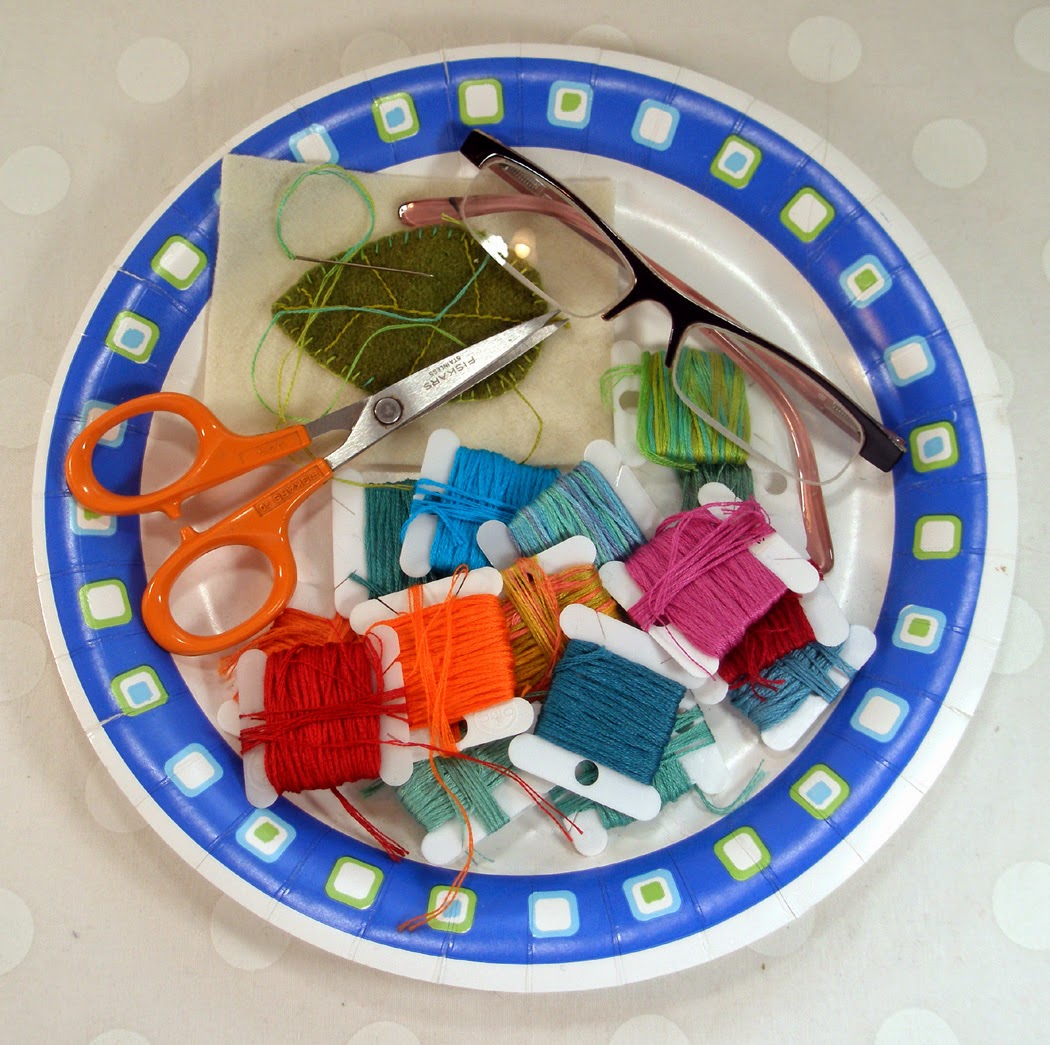
Tools and Materials


You Will Need-
Fabric, preferably linen or a linen blend in ecru or a natural off-white color. A fat quarter or a quarter of a yard will give you plenty of fabric for practice and for pincushions.
Embroidery Needles
Embroidery Floss in many colors (See color list for each flower).
Perle Cotton in Off White or Ecru in Size 5 (to tie off sections later)
Polyester Fiberfill
Sharp, small scissors
A long soft sculpture needle (to tie off each section)
A sharp sewing needle to close up your pincushion
A disappearing or water soluble marking pen or a friction pen
Pencil
Paper
A Pattern (Use Template or draft your own with a protractor)

Optional:
Jeweler's pliers, needle nose with a smooth jaw.
Emery enclosed in muslin (See my Emery Post)
A Needle Threader
A scrap of muslin to practice your stitching on. Great to have if you are a beginner.


Step One
Template Click to download JPG.
The PDF file is here. (Why don't you print two copies) Use one for sketching ideas and one for your pattern.

If you cannot print the template, you can draft your own.
On a piece of paper draw a circle 6" in diameter, (across).
Using a protractor, divide your circle into 6 equal sections. Each section is a 60 degree slice of the circle. (Think of it as a fabric pie.)
From the center out, mark you sections on your pattern. (See Template) You don't have to draft your own pattern if you downloaded a the template. But I recommend you try your hand out at drafting patterns. Once you gain confidence you can design just about any pattern you want.


Step Two
Loosely sketch your flowers onto a piece of scrap paper first until you find a pleasing arrangement. Your flower should sit inside one section. Be sure to leave a 1/4" seam allowance around the outer perimeter. You may also want to leave 1/8" space around the section lines.

As you design, deep in mind what color each flower will be. You want to mix your flower colors up. For example, one flower could be red, one yellow, one white, one blue, one orange and one purple. (See the examples above).

Keep your flowers rather simple at first. Each line with eventually be a strand or two of floss. Tiny lines mean tiny stitches. Because our pincushion is on the small side, you wont have room to get into very involved embroidery. If you are a beginner, complex designs can seem overwhelming.
Don't let me scare you. This is really a fun project. I promise! This is a great project for someone who is new at embroidery because nature is imperfect, you can be imperfect too!
Just keep your sketches simple. Once we start stitching, I will show you how to transform shapes and lines into stitches.


Step Three
Using a light table or a window, trace your pattern onto your linen.
Then cut your circle out of your linen. Be sure to allow for least an inch all the way around your pattern.

Then trace your sections with an erasable water soluble or friction pen.

Next, make a dot in the middle. This is where your button will go later, so its nice if the center mark stays there until the very end. This dot will be covered so use a pencil just for this one mark.

Then mark your seam allowance with an erasable water soluble or friction pen. This mark should go around the outer circle to mark your seam allowance. I have this area highlighted on the template. (I once embroidered into the seam allowance. I don't want to do that again!)

Whew! That was a lot of information but we are past the prep step.

Next we will be transferring your pattern to your linen.

Then we will start stitching! Oh Joy! I promise, you will love this project once we get started.
See you soon!


Thursday, July 17, 2014

Embroidery Floss Basics


I'm going to be creating a tutorial for my Summer Garden Pincushion very soon. I have a few orders in my shop which has delayed my efforts, but I hope get this posted for you very soon. Below is my 8 section Summer Garden Pincushion on Linen. I'll be posting a tutorial for a 6 section. If you do a few flowers a month, you should be able to give your pincushion away for Christmas! We'll work on a specific flowers and stitches each month. Just a few stitches can be transformed into multiple flowers. The tutorial is free for all. If you would rather work from a pattern, it will be for sale in my Etsy shop in August. The free tutorial will have all the instructions. You should have no problem designing your own flower pattern.
Well, more to come on all of that.


I'm going to walk you through your trip to the craft store to pick out your embroidery floss colors, needles and linen. Once you have all of these materials ready to go we can get started!

I use DMC floss and I suggest you do too. I would not recommend using a budget brand of embroidery floss. You will find that it knots up more often. The colors may be bright, but they may fade much sooner than a quality thread. If you are going to invest a lot of time into your work, you want it to last, and you don't want to spend more time fighting your threads than you do stitching your stitches. When each hank of floss is less than 40 cents each, why not splurge!

How to Choose your Colors
I also recommend that you have a series of warm and cool colors in each color. This will allow you to pull some flowers forward and push some back. I'll explain those color concepts as we create our flowers. Here is a little illustration of what I mean by warm and cool. Warm colors have more yellow added and cool colors go more to the blue side. You can see that these colors also go from lighter shades to darker shades. Light colors have more white added, while darker shades have more black in them. When you see a color on the DMC display in the store, they really have no rhyme or reason on the shelves except for the little groupings of each color as they became available for sale. Most colors are grouped by shade, lightest to darkest, but not every color is that organized.


Here is a Revised Embroidery Floss Basic Color List to take to the store. Its my recommended list of colors for any type of flower or nature embroidery. I've add a few tips and tricks from this post all on a handy PDF you can print and take to the store. What store? Embroidery floss can be found at just about every fabric and craft store. I order some of my colors on-line. A word to the wise. If you stick to the local store in town, getting more is easy. There is nothing worse than running out of a color in the middle of a project. Groan!
Don't be afraid to pick up extra colors or make substitutions. I always believe in putting yourself into everything you do!

I guess I'm giving you permission to go crazy and buy lots of floss! Yes, tell your hubby that I said you need that big pile of embroidery floss. At about 40 cents a skein, why not?!


Here is how you add some method to your shopping madness.
Choose 3 pinks- Choose the main flower color and 3-5 coordinating colors; one darker, one lighter, one warmer and one cooler shade.
Then repeat the same for your yellows, reds, greens, purples and blues.

Don't forget to add ecru, white, brown and black. You just never know when you are going to need them.
You can add some various shades of black from pale gray to near black. Those also have warm and cool shades, but I wouldn't worry about it as much in the beginning, just add a few for now. As you build your stash, you will figure out what you like and what works.

I also love the variegated colors. They are sometimes hard to find in the store, but they make stitching grasses, leaves and petals fun. The color changes gradually as you stitch. Here are my favorites. (I photographed Perle Cotton skeins as well. It may be a bit easier to see the color changes.

I should note that there are 558 of floss colors! It can make you crazy!
Some colors have an unnatural feel to them. They may have a neon glow or even glow in the dark! Avoid those for right now.
Below you can see a few different oranges, pinks and blues. One is better for flower work than the other.
I chose a strange color and then a more natural choice. I'm not saying that you shouldn't buy those great colors. They just may not work for this particular project.

Here are some tips from my Managing your Threads page. You can find more information there, including more details about Perle Cotton.

6 Strand DMC Embroidery Floss is my go-to embroidery thread. It has 6 separate strands which can be pulled apart for your desired thickness.
Floss comes in 8.7 yard skeins in 454 colors.
It is the perfect choice when doing tiny work with lots of detail. Most crazy quilt designs are embroidered with single or 2 strands. I use 3 strands when I want a good filler or a thicker line. I also use one strand for tiny details. However, 2 strands will give you an elegant look.

When I bring my floss home I put each color on a bobbin right away. If I buy duplicate colors I put those in a box. If you just put them in a big pile and handle them often, you will find they are harder to manage later. Kinks promote knots. Loose ends mate with other loose ends and that creates messes.

Bobbins keep my stash tidy and bobbins fit into most organizers nicely. Its great to see all your colors in a glance.

DMC sells plastic bobbins. Any brand will work.


Unwrap the label from your floss. Make note of the color number on your bobbin. DMC offers bobbin color number stickers for easy labeling.

Carefully split the skein into a loop.


Place the loop of floss over your hand so the loop spins and the skein easily unwinds.
Begin winding the floss onto the bobbin. As you pull the thread it will spin around on your wrist and easily unwind without tangling. If it catches up on itself, slow down and unwind it by hand for a bit until it starts to spin on your wrist again.


When you are done, keep them clean and organized in a box. I found mine for 99 cents.
Everything in its place...


I have a confession. My boxes do not look like this. I used this photo from Junie Moons blog.

A few more tips...
I usually pull my go-to colors for each project and put them on a paper plate. I keep my needles, a spare pair of readers and my scissors there too. When I am ready to stitch or when its time to stop, I can move the whole thing around where needed and my madness is contained.


When I get ready to stitch I unwind my floss from its bobbin, I cut each length 12-15 inches long. If you use very long threads, you will have to deal with knots. If you choose a short length, you will be cutting and splitting more often.
Floss comes in 6 strand hanks. You will need 2-3 strands for stitching.

How do you pull those strands without a tangled mess?
Begin by smoothing your cut strands between your fingers. Pull gently from one end to the next 2 or 3 times.
Then start pulling individual threads from the middle of the strand. Pull the strands apart until you have the number you desire. Work your fingers between the main strands and the one's you need and pull them apart slowly. Try to keep the ends from tangling up on each other as you pull.

When ever you find things knotting up, stop! Slow down. Be patient. Its much easier to undo knots when they are loose.

I usually put the other strands back on the bobbin. Just wind them in the opposite direction of the main floss and be sure to tuck those ends in. Your box will soon become a birds nest of a mess if you just let those strands fly around on their own. They like to play when you aren't looking. Before you know it, you will have a real mess on your hands. Its best to make a good practice of organizing as you work. You'll thank me for that advice later.


When you are stitching you may have leftover threads on your needle. Unless you have nearly a whole length leftover, I recommend that you throw away the rest of the floss. As you pull the floss through your fabric it wears down the fibers. You will find that as you get near the end of a length, it gets easier to stitch. The floss is actually getting thinner. I find that the last bits are too thin to give me a good, solid line and certainly too thin to fill in a space. Floss is so inexpensive. Don't work with scraps if you don't have to.

While you are at the fabric store, why don't you pick up some needles and linen right away?
I'll try to explain a bit about needle types. But. why not pick up a few kinds and see which one you like best?
Needles

Chenille (2) and Embroidery (3) needles have a sharp point. When working with tightly woven fabrics, like quilting or batik cotton these are a must. They are also great for fine fabrics such as organza and silk. They will glide smoothly through the fabrics without making noticeable holes in the fabric.

Tapestry (1) needles have a blunt or round point. They work well on linen, wool or aida cloth or any loosely woven fabric.

The larger the number, the smaller the needle. My favorite needle is a size 26 Tapestry. Its sharp enough to piece most fabrics, but not so sharp that it pokes my fingers when I bring the needle to the back side of my work.

I've also included a Soft Sculpture (4) or Upholstery needle for this project. Its very long and has a nice size hole large enough for perle cotton. You will need this needle later when adding the sections to your pincushion and for adding the buttons.

Last but not least, you will need a regular sharp needle. I often use a fine applique needle (5). This is used to close up the opening in your pincushion after you add the stuffing. A fine needle makes is easy to create a nearly invisible mattress seam to your work.

Linen
You will need linen as your main pincushion fabric. Its a lovely fabric for embroidery. It has a nice, regular weave. Floss glides smoothly through linen with each stitch. It comes in a variety of colors including many shades of cream, white and ecru. Find a medium weight linen. If it is too thin, you will be able to see through to the back. If it is too heavy, its harder to get fine details.
The weave should be regular and not too nubby. Knots and nubs will get in the way of your design.
I have photographed the linen colors I keep on hand. I use the middle color for this pincushion.


I have used the dark green and a bright red for some projects. Color fastness is a real issue with colors. Presoak your colored linen in vinegar to help set the dye. Then prewash it in a warm wash with soap and put it in the dryer to also set the color. I prewash and dry all of my linen. Remove it from the dryer immediately to help reduce wrinkles. I also iron my fabric just prior to stitching on it.

You will need to block your embroidery design after it is stitched. I find that prewashing and drying the linen first, makes blocking more predictable. You won't have to worry about shrinkage. After hours and hours of stitching, it would be so sad to have your linen shrivel up under the strain of the embroidery.

If you have any questions, please leave them below. You may also contact me through my Etsy shop.


Have fun on your shopping spree!

Next, we'll go over the tools and remaining materials you will need for your pincushion.


Friday, July 11, 2014

Play Time!

I know I said that my next post would be a stitch lesson. Sorry!

Its just that I have had some play time and I just wanted to share my most favorite pincushion. I say they all are but this is my new favorite.

I used all vintage fabrics in it. I had ordered some beautiful feedsack pieces from Etsy along with a group of vintage cottons in assorted prints. I also found some beautiful hand quilted blocks in a soft pink and black and white print. They feel like soft rose petals. The colors have this lovely faded patina. The prints are fun, a bit bold and some just plain homey. I treasure these fabrics, but I promised myself I would not allow them to collect dust.

Isn't it just so hard to cut into some fabrics? Well, I recommend that you just dive in. The water is warm and playtime is fun!

Because I only have a few dozen I mixed and matched colors and prints I probably wouldn't have I had more. In fact, I had been pondering what to make of the green print with the bold black and white fabrics. How wonderful is that?!
It made a great framing color and the sturdiness of the fabric made a great back. I think it was from a table cloth or home dec fabric.


My favorite part is the embroidery. You know, its been so very long since I have had the time to do something new. I think that each design I find time for is going to just explode from my heart, like this one did. The bird is a purple finch. I have a flock of them nesting near my bird feeders. This is the male. The female is speckled in many shades of brown, like a cup of coffee as you stir in your cream.

I love how proud he sits on his perch. I try to do a few sketches while they eat. I have eighteen different birds coming to eat at my pine tree diner. I adore them all. Its so relaxing to hear them sing and call to each other.

Well, I just wanted to share this one with you. It sold 30 minutes after I listed it, so it wasn't around long. It did go to one of my dearest customers. She is giving it to a friend, which makes me so happy. I almost kept this one for myself. It was hard to let it go, but it went to a very good home so that makes me feel better.

I have more fabric left from my vintage collection. I also have about 30 new fabrics to show you! I have them photo graphed, but not processes so it may be a bit. I have a back log of orders to work on again. Oh my. Play time is so precious. I will try to sneak in some new things soon. In the meantime, I have some tutorials to prepare for my next post!

Well, I hope your summer is warm and fun and you are finding time to play. If you can't find it, make it! You never know what you will discover!